Welcome! In this post we explain what the Mind Mapping technique is and show you how you can use a free online tool to begin creating your own.

Firstly: What is it? Mind mapping is a visual representation of information, ideas, or concepts that are organised around a central theme or topic.
It is a graphical technique that can help you brainstorm, analyse, and generate ideas in a structured and interconnected way.
Mind Maps vs Lists
Take the following list of items a student had composed to help them prepare for a homework assignment:
- What’s the subject of the homework?
- Are my class notes enough to complete it?
- When’s it due in?
- How long will it take me?
- Where will I do this work?
- Do I need to go to the library or can I just use Google?
- Is this to be submitted electronically or written down?
We can take those questions and draw the following mind-map diagram:
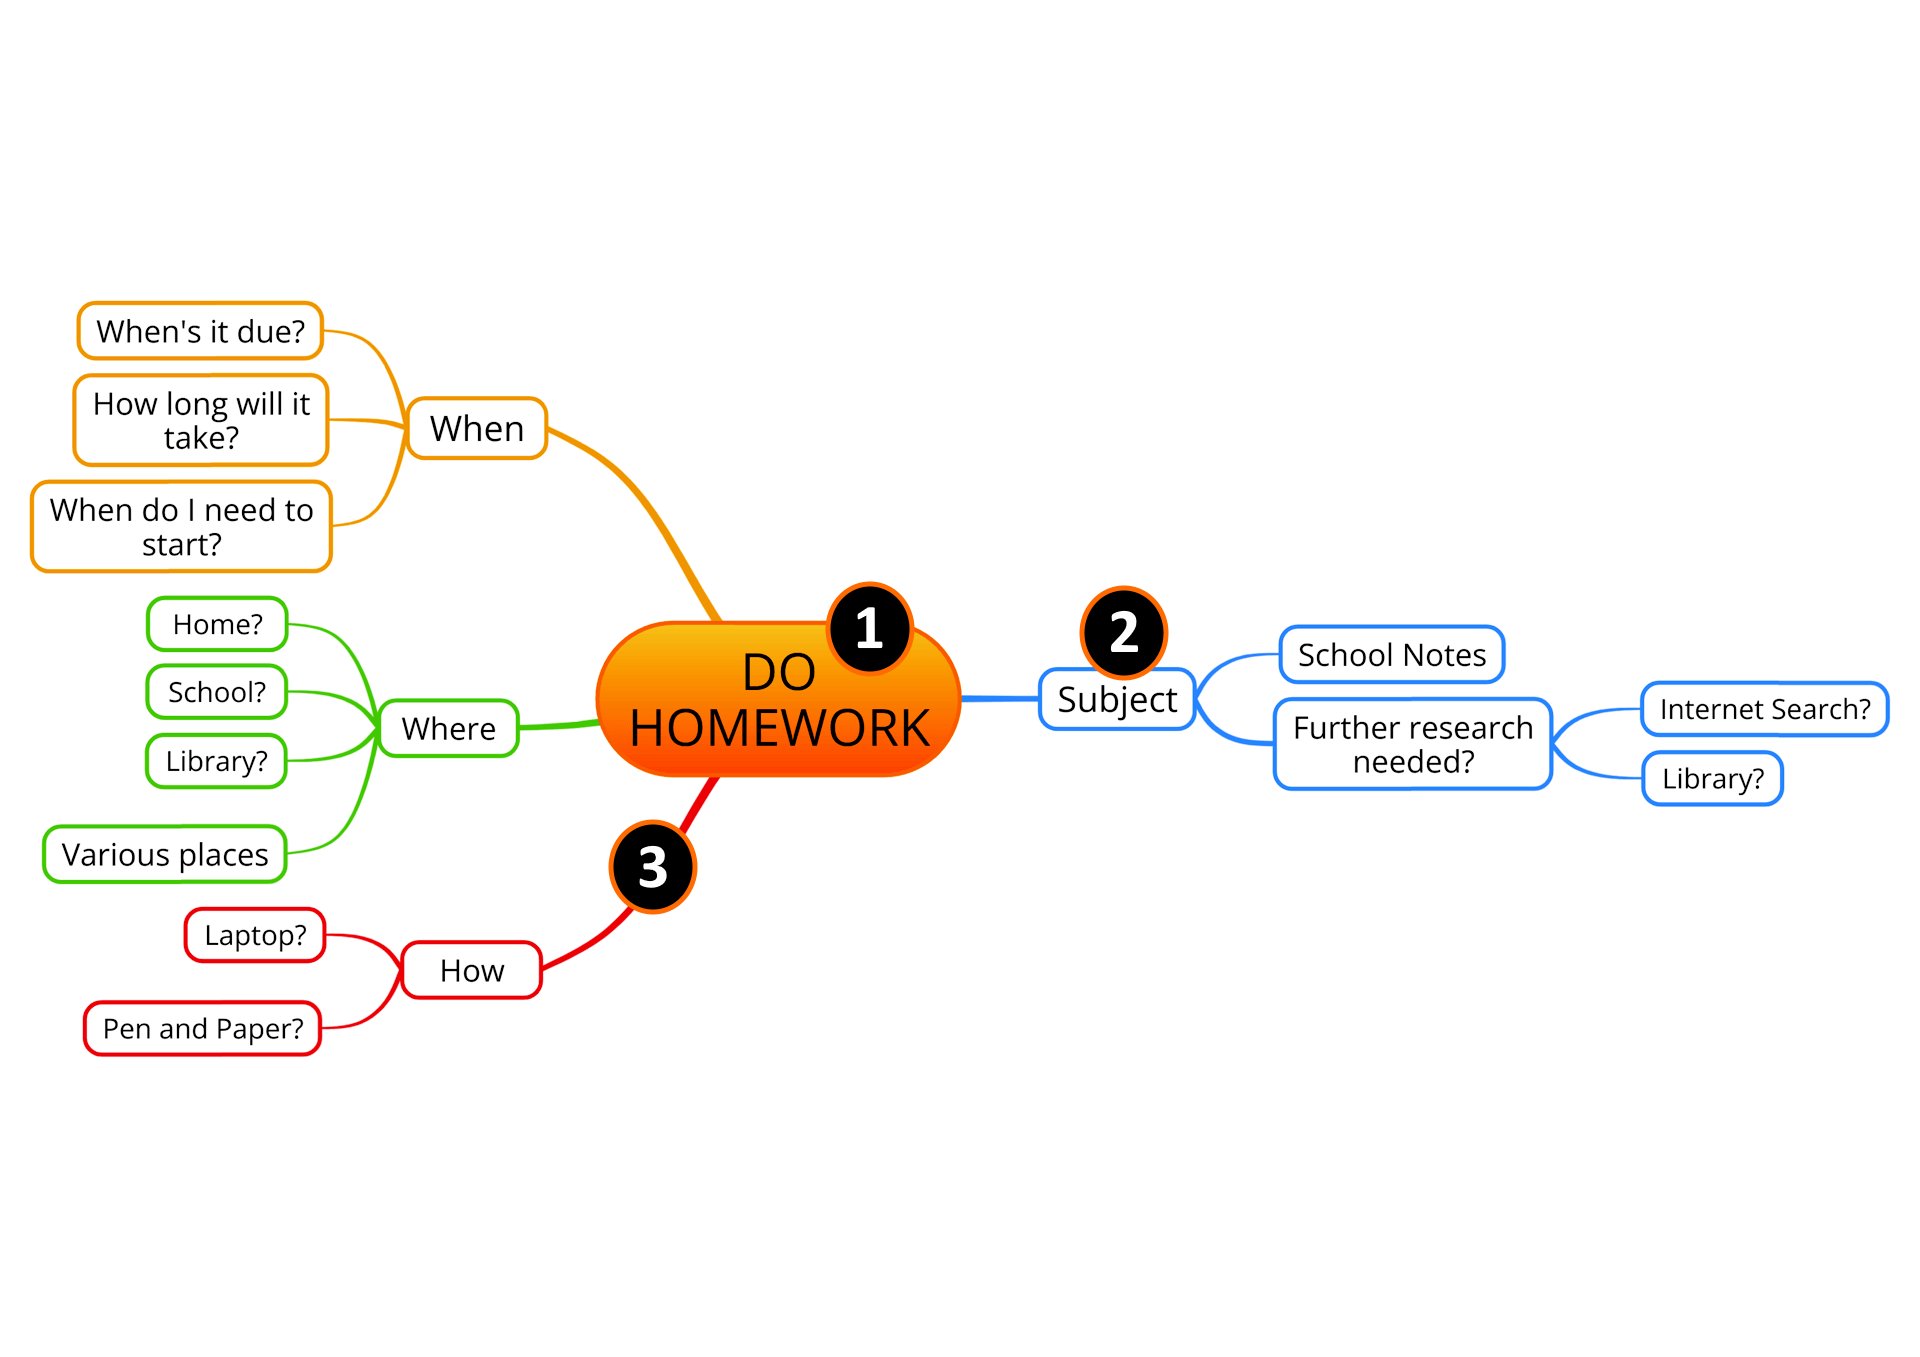
Doesn’t that look more intuitive? We have organised the list items into sub-topics: “When”, “Where”, “How”, etc…
Each “Node” contains a question, with other branches sprouting from them to other nodes that either contain an answer, or another question.
When you begin a mind map, you start with the overarching theme that you want to explore. As you draw your mind map you will uncover ideas, issues or solutions of that theme that you might not have thought of at the start, and add them as new branches. Each branch you can explore further on their own, adding more branches until you are satisfied you have investigated your main theme to it’s fullest.
In Image-1 we have highlighted the chief characteristics of a mind-mapping diagram:
- Central Theme/Topic: The main idea or topic that the mind map revolves around is a node placed at the centre.
- Nodes: These are shapes, often containing text, that represents specific details, concepts, or ideas related to the subtopic. (Notes: AYOA calls these “boxes”)
- Branches: Radiating out from the central topic, these branches refer to each of the node-line offshoots that go to make up the mind map diagram.
- Parent/Child/Sibling Branches: In the “Do Homework” diagram, the central theme node (1) is the Parent to ALL the other Child branches that radiate out from it. But, you can also call the “Subject” node a Parent because it has branches below it to (“School Notes”, “Further research needed”). These branches are Child nodes of the “Subject” node. These nodes are also Siblings, because they are both children of the same parent. It’s just like a family tree!
Looking at the mind mapping diagram in Image-1 we can see the questions the student asked have been separated into their own areas of the diagram.
We can now create new branches off each question node to answer the question posed.
How mind maps are organised provides the user the ability to concentrate on one node at a time (a question, in this example).
There is no limit to the branches and nodes a mind map diagram can contain, though readability may become an issue! Luckily, AYOA can help with that, as we will learn later, AYOA can hide nodes and their child branches.
To close off this section: mind-mapping is a very versatile technique and can be applied to a variety of purposes, including:
- Brainstorming
- Facilitating creative thinking
- Problem-solving
- Note-taking
- and Planning
Now that you know what mind mapping is, and been shown an example of what it can be used for, in the next section we will show you how we created the “Do Homework” mind map using a free mind-mapping application called AYOA.
How Do I Draw A Mind Map?
With AYOA you can draw and manipulate a mind map with ease.
Animation-1 below shows how, in AYOA, you can add to “sibling” branches to the central topic/theme, and drag and drop a branch to another location around the central theme:

The following short tutorial walks you through adding a new branch and node to a mind map. This is the very first thing you should learn. Once you have mastered this technique, you will be able to create any mind map!
This tutorial was written using the FREE version of AYOA. Signing up for AYOA is easy, you just need an e-mail address to get started. To sign up for an AYOA account, click here!
Once you are signed up and logged in, click on the create button:

In the dialog box that appears, select the “Blank mind map” tab (1), then enter a name for your first mind map (2), from the dropdown list (3) choose “Mind Map” and finally click the Create button (4):
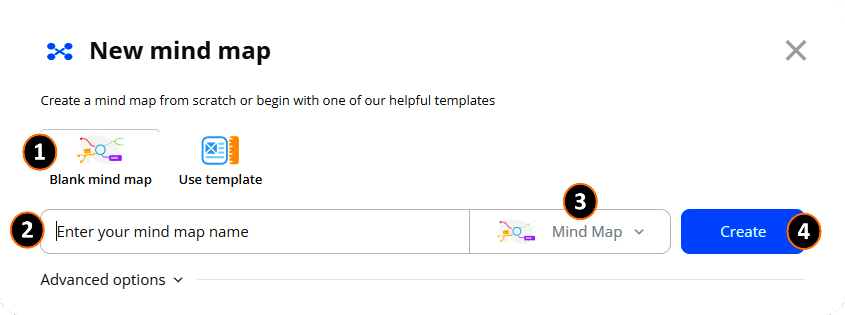
A blank mind map is created with a single node at it’s centre.
You are now ready to begin adding branches to your new mind map!
For this example, we will use the mind map we have already talked about, the “Do Homework” mind map:
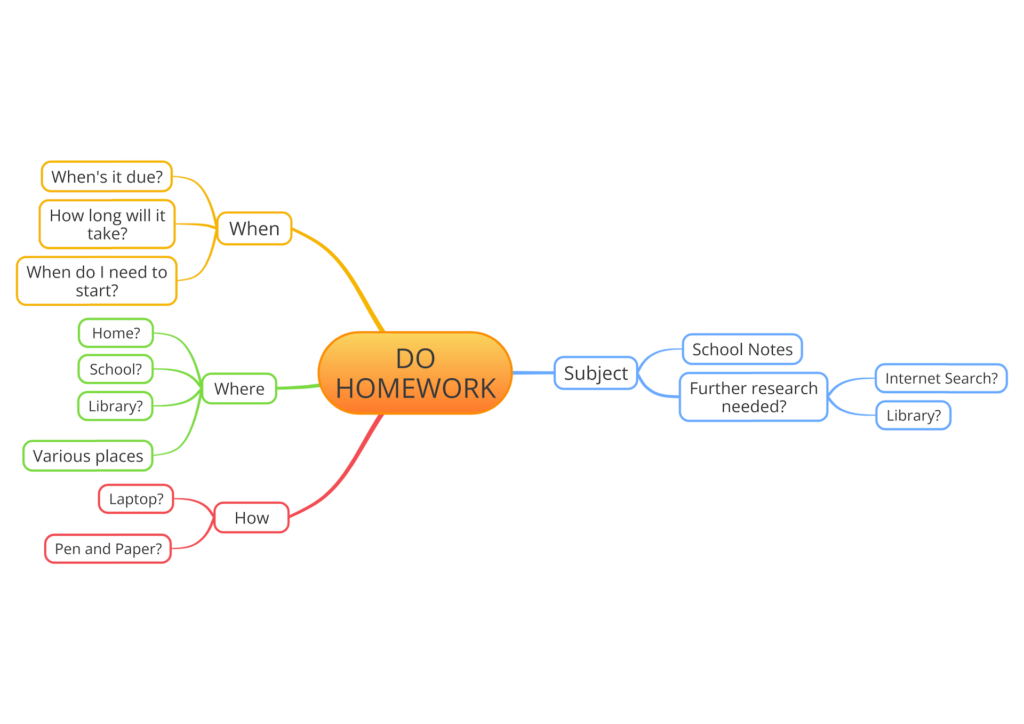
We will show how we added the “School Notes” node (“box”) to the “Subject” branch, to the right of the central theme node.
Firstly, we want to add a new node. We can do this in two ways: 1) click the “+” button and AYOA will add the new branch automatically into a suitable space on the diagram. 2) Click and hold the “+” and drag a branch in the direction you want to place it.
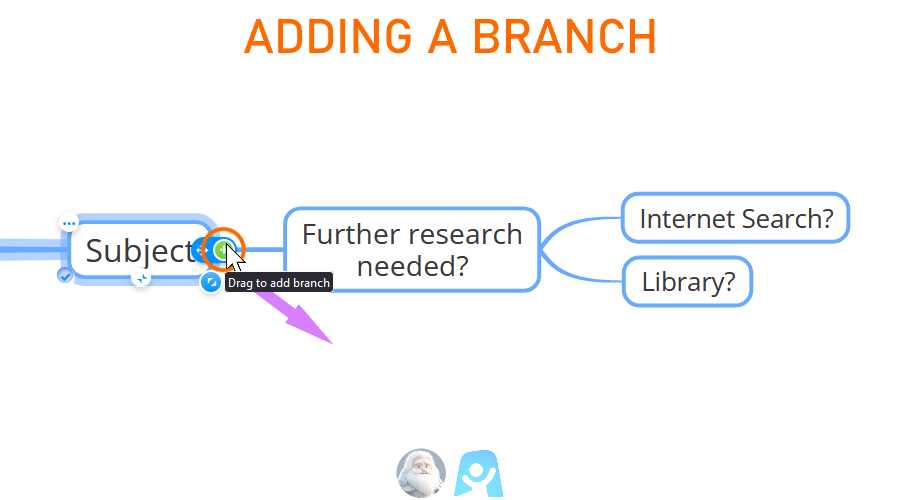
Once the branch has been created, AYOA opens a formatting dialog-box and makes the new node (“box”) the focus so you can type some text into it. The dialog box gives you options to change the font type, size, colour and decoration, as well as how the node looks, e.g. its background colour:
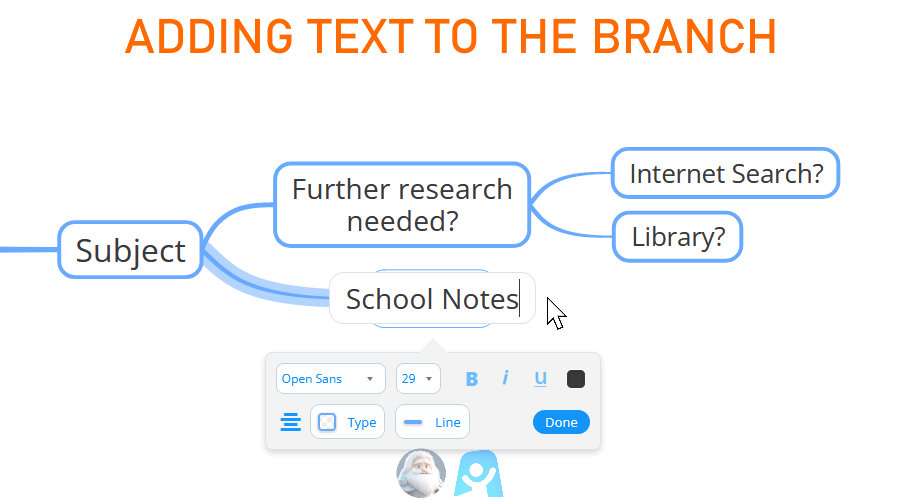
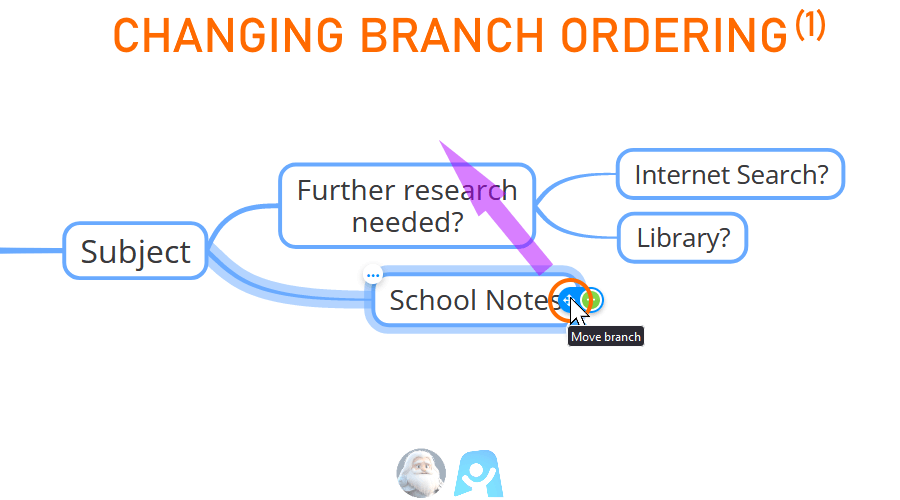
Once the new branch and node have been added, you can manipulate them further by changing position around it’s parent branch/node. In this example, we want to move the node above “Further research needed?”.
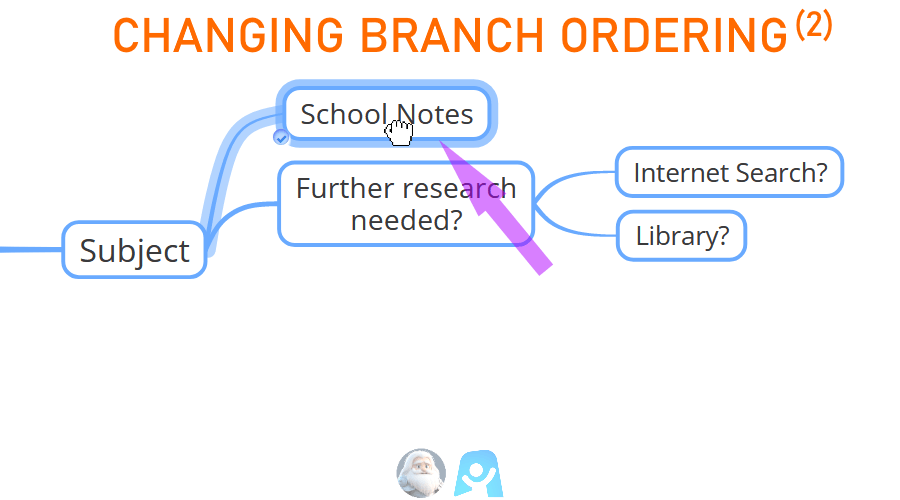
To do this we click the node to select it, then click and hold the blue direction button and then drag the node to its new location:
Then we release the node to set its new position.
After a while, your mind map may have many branches and nodes, and you may find it difficult to see what is going on; you can’t see the wood for the trees!
To help de-clutter a mind map, AYOA allows you to show and hide child nodes of a branch. The next set of 3 screenshots shows you how to do this:
Firstly, to hide the child nodes, select the parent branch you want to act on, then click the button with the two facing arrows:
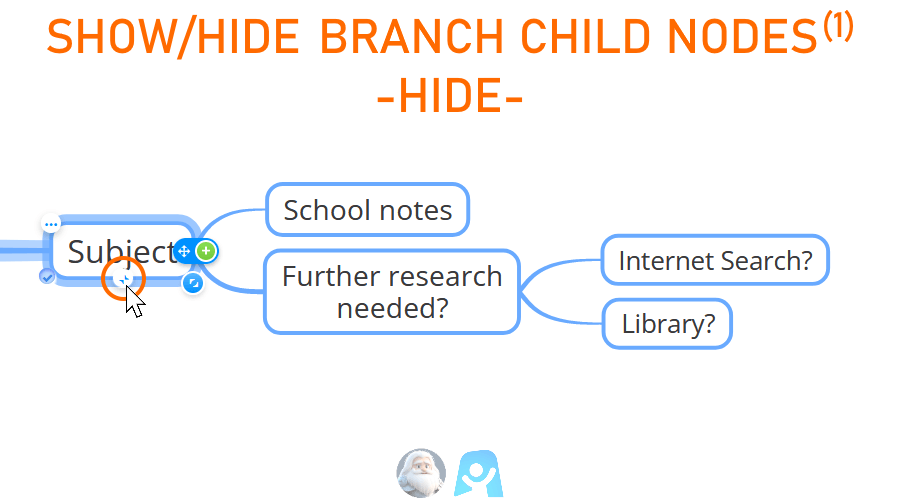
That branch’s child branch/nodes have been collapsed and hidden. To expand and show these branch/nodes, click on the parent branch’s button that is now showing two arrows pointing away from each other (note: the number 4 is the count of hidden branches):
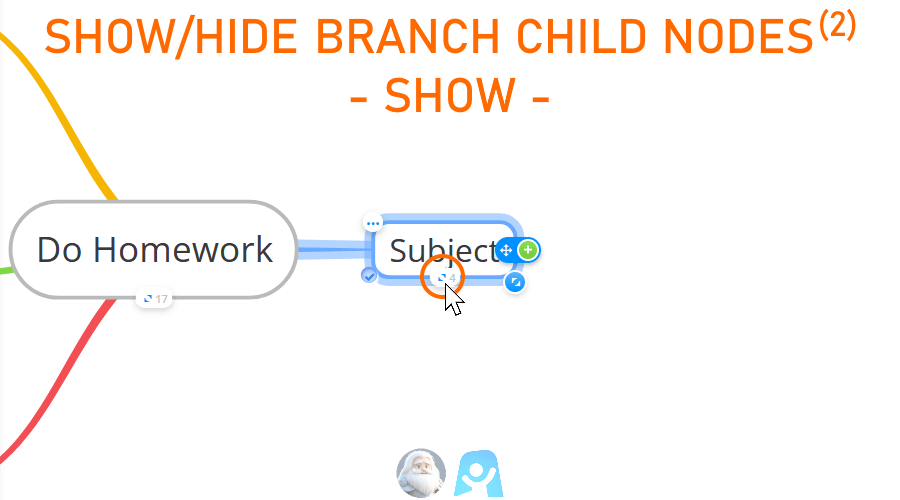
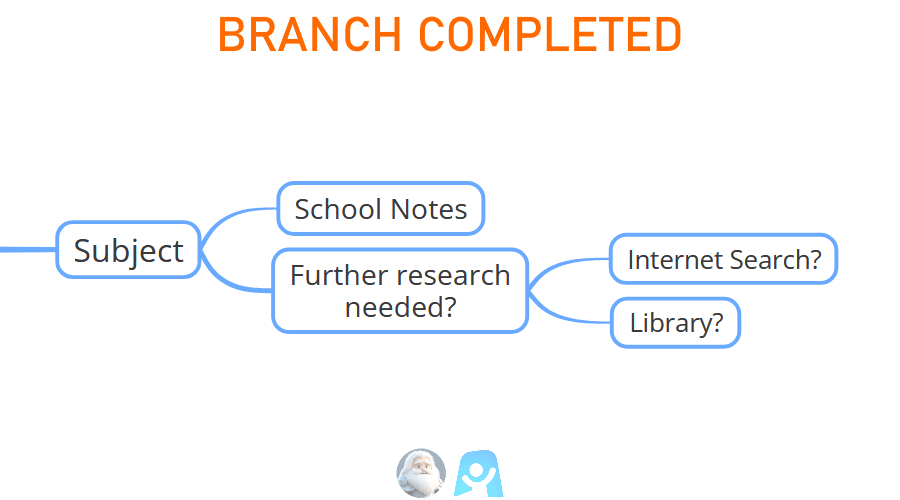
There, the “Subject” branch’s child nodes are visible again.
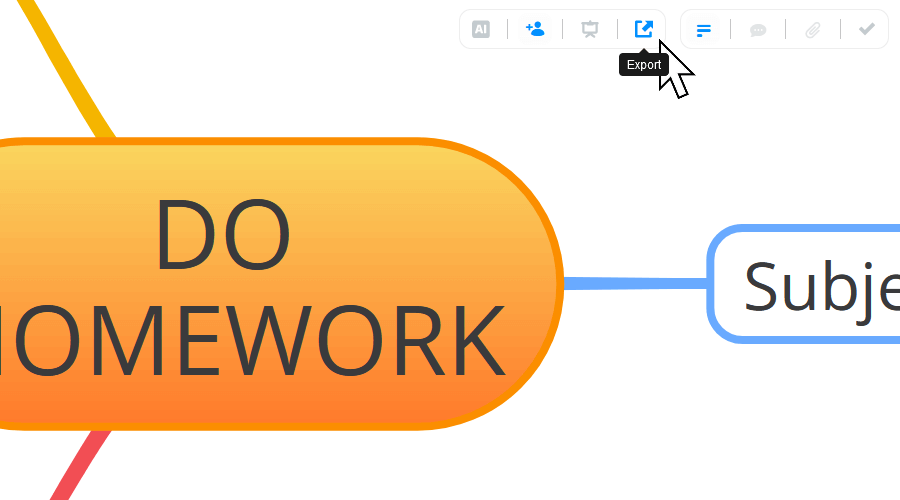
Once you have completed your mind map, you can save it to your hard drive using the “Export” option:
The free version of AYOA provides the following two export formats:
- JPG
- PNG
If you upgrade to a paid-for version of AYOA, the export formats expand to:
- JPG
- PNG
- Word
- PPT
And that’s it! A quick introduction to mind mapping and how to utilise the AYOA drawing application to create a mind map.
We’ve also created a video showing how to create an account with AYOA and draw the “Do Homework” mind map:
We hope you found this post useful. If you haven’t already done so, you can sign up for AYOA by clicking the “Start with AYOA” image to the right of this post, or by clicking the button below!
Thank you for reading!
